Schedules & appointments
Practitioners can navigate and oversee the calendars for each of their practices through the Calendar section in their profiles. From adjusting time slots to making patient appointments, and handling booking changes, this tool provides a range of actions for providers.
Creating & editing practices
“Practice” stands for the practitioner’s schedule at each of their working places, e.g. private practice, group practice, hospital based, etc. A practitioner can have as many practices as they want as long as their working hours do not overlap. There are three types of practices a practitioner or scheduling admin can create:
- Video - online consultations. This practice can be valid for both audio and video calls conducted in the telehealth component
- In-person - face-to-face consultations at a physical location
- Home visits - a practitioner is going to the patient’s house
The practitioner is requested to enter information about the practice such as: address, phone number, reasons for visit, accepted payment methods, prices, etc. Some of the fields are required while others are optional.

Below is additional information about the specific fields that need to be filled out.
Appointments
- Online bookings - keeps the practice visible and bookable to patients
- Hidden - hides the practice from patients. Only the practitioner can book on their behalf.
- Works with children - indicates the practitioner can see children within this practice
Payment methods
- Cash/personal payment - allows the patient to pay out of pocket.
- Private insurer - if selected, you will also need to choose at least one insurer company from the list. An admin can add new insurers via the scheduling app admin should it be requested.
- Public insurer
Accepted reasons for visit
(Naming can vary and the platform-wide list is added from the scheduling app admin).
The practitioner can have many types of appointments for different reasons, e.g. medical problem, follow-up, vaccination, etc. To add a reason for visit use the search bar and select the entry you want. You can also define, for each separate reason:
- Popular - defines whether the reason shows up above the rest in a new category (“Popular”) whereas the rest of the reasons are ordered alphabetically below
- Duration - how long the appointment will take
- Price - how much it will cost
- Days - The practitioner can choose when a certain type of visit is applicable. For instance, the practitioner might perform vaccinations only on Monday or accept follow-up consultations only on Thursday and Friday.
Notifications
- Email notification for every appointment - emails for confirmation, rescheduling, cancellation.
- Email notification for every review - email for submitted patient reviews.
- Message notification for every appointment - SMS for confirmation, rescheduling, cancellation.
- Message notification for cancellation on the appointment date - SMS for cancellation.
Booking
- Earliest possible booking - this setting determines the earliest time a patient can schedule an appointment. A value of "0" means patients can book immediately, whereas a setting of "6" requires patients to book at least six days in advance. Metric: hours or days.
- Latest possible booking - indicates how many months in advance an appointment can be booked. Metric: months.
- Additional information - if there is any additional info to the booking, it can be added here. This text is displayed below the practitioner’s calendar.
- Appointment guide - instructions to the patient that are visible on the last page of the booking process.
- Warning before booking - this can only be set in the scheduling admin. It is a pop-up that appears to the patient when they select a time slot from the practitioner’s calendar.
- Professional Fees - displays fees under the practitioner’s calendar, visible to the patient. These are not tied to a payment in the system but can give the patient an idea about the doctor’s fees. For instance, a reason for visit could be initial consultation, and the fees might indicate to the patient that during this consultation, they will be charged X amount for Test 1 or X amount for Test 2.
You can rearrange the order in which all practices are displayed on the dashboard by using drag-and-drop. This also determines the order in which they will be displayed to patients.
Setting up working hours
Practitioners set-up their working schedule through My practices ➝ Working hours.
Parameters
- Validity - limit the time validity of your working hours (schedule) by entering an ending date. If you leave the field blank, your working hours will perpetually remain the same. You can still change them later on by using the “Split” option.
- Default appointment length - set the slot duration of the calendar
If the default appointment length is different from the duration of a reason for visit:
Reason for visit has 30-minute duration, Default appointment length is 15 minutes. Selected reason for visit will result in the system aggregating two time slots (2 x 15 minutes) in order to accommodate the duration of the reason = Reason for visit has 30-minute duration, Default appointment length is 20 minutes. Selected reason for visit will result in the system aggregating two time slots (2 x 20 minutes), but the extra 10 minutes from the second time slot will not count towards the patient’s consultation.
Schedule
- Select “Working days” (entire 7-day week) or “Odd/even days”.
- Click the "+" sign on all your working days and day by day select the duration of your shifts. You can add more than one shift per day but your shifts cannot overlap with each other or with those of your other practices. You can leave unset slots between the shifts for breaks.
- Capacity - determines whether more than one patient can book the same timeslot. Example: Capacity = 3 Free time slot = 9 a.m. 3 different patients can book that 9 a.m. time slot
- If this is an in-person practice, you can choose which shifts are “in-person", “video” or both.
- If this is a home visits practice, you can choose which shifts are “home visits”, “video” or both.
- For video practices, there is no such selection - the shifts are only “video”.
- Hidden - In case you do not want the shift to be visible and bookable to patients.
Change an existing schedule
Should the practitioner need to make changes to their schedule they can follow the below steps:
- Split - split a currently live schedule and set a new one. Your settings will be copied. Always select a date in the future.
- Copy to new - copy a schedule and its settings. Always select a date in the future.
Whenever the current date falls in the from-to period of the validity, the working hours cannot be changed. In order to edit a calendar in this case, its starting date needs to be in the future.
Calendar view
The practitioner's calendar represents a dashboard with all available and booked time slots within their practice. Each practice has its own calendar that is not interfering with other practices' calendars (referring to cases where specialists have more than one practice). Practitioners access their calendars via:
- Calendar at the top right corner sitting next to their initials
- Calendar in the left hand side menu
Both options lead to the calendar & practices dashboard. If the practitioner has more than one practice, they can switch between calendars using the tabs at the top left.
Edit working hours for a specific day only
For various reasons a practitioner might want to update a specific day's schedule or block the entire day.
- To block (turn off) a day, go to "Calendar", click the name of the day and select "Turn off this day". Turning off a day will automatically delete all active appointments. Before a planned leave, the practitioner or admin staff should turn off those days in advance.
- To create a schedule for a non-working day - go to “Calendar”, click the specific date, click “Edit” and set up your shift/s.
- To copy the schedule from another working day - go to “Calendar”, click the date you wish to copy from, click “Copy” and paste it to the non-working day by clicking its date and then “Paste from…”.
- To edit the shift/s of a working day, click the date, click "Edit", set, and save.
If you need to edit a day or a few, do it from the "Calendar" section. If your schedule will change significantly, set up new working hours from "Practices”.
Rescheduling appointments & blocking time slots
Practitioners can reschedule or cancel appointments using the calendar dashboard. To reschedule a booking, open the corresponding slot and select Reschedule. A "select a new slot" pop-up will appear on the screen. After selecting a new appointment time, the user should confirm whether to block the original slot and then finalize the rescheduling. Following this, an email notification will be sent to the patient, informing them of the updated booking details. To cancel an appointment, select the slot and click on cancel. The practitioner can share the reason for cancellation in the pop-up appearing on the screen. The patient will receive an email notification for the cancellation stating the cancellation noted by the practitioner (if any). Booking on behalf of patients Practitioners have the ability to schedule appointments for their patients. They should choose a free time slot in their calendar, after which a pop-up will appear for entering the patient's details. The practitioner then proceeds to select the necessary information. The type of consultation (video or in-peron)
- Patient Name
- Patient phone number
- Patient email
- Reason for visit
- Appointment length
- Payment method
- Whether this is a first time visit
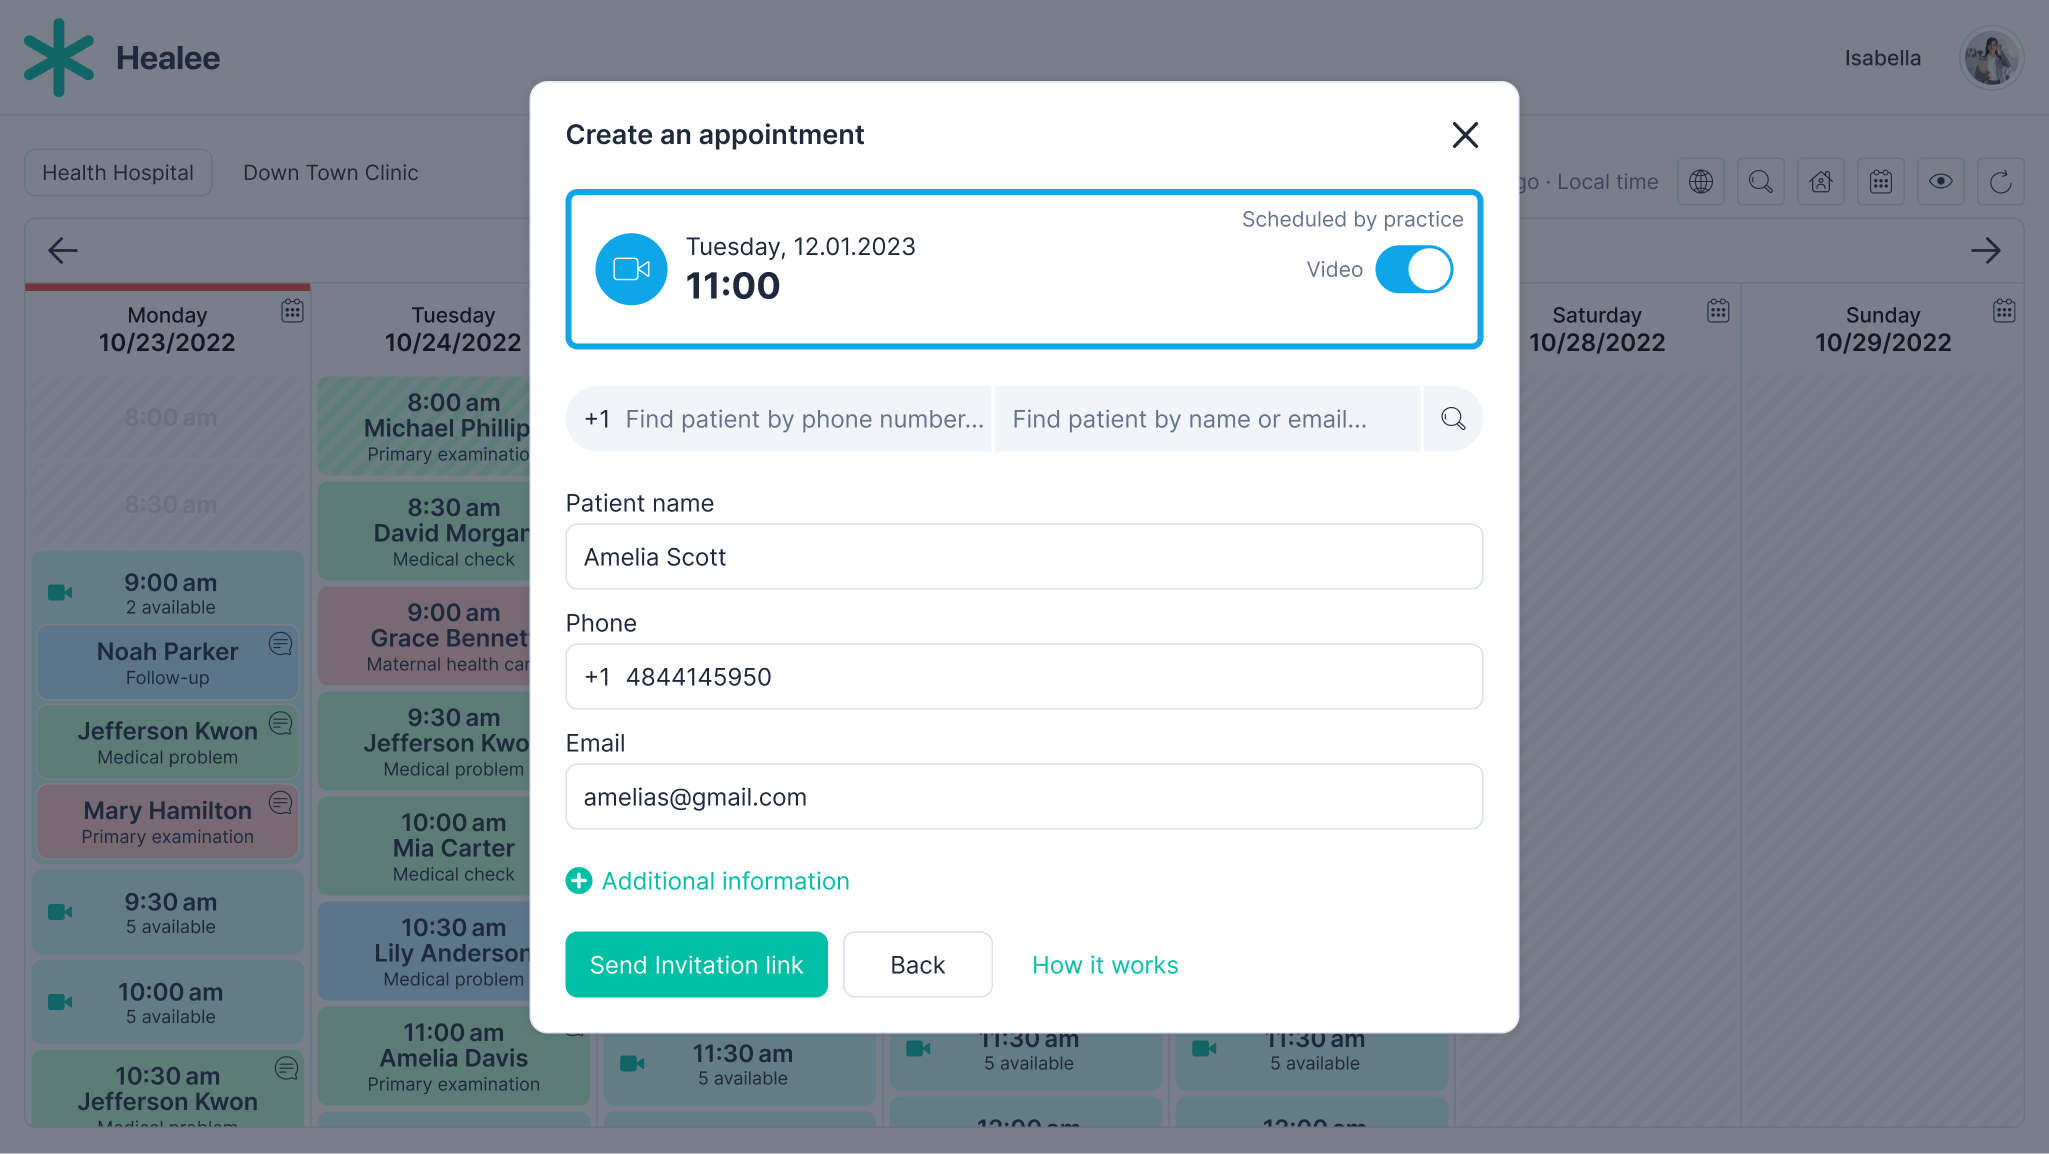
Once all required fields have been completed, a confirmation link is sent to the patient. The latter receives an email prompting them to log in their profile/register and follow the necessary steps to confirm the booking.
The appointment is marked as "pending" in the practitioner's calendar until the patient confirms the booking on their side. Upon appointment confirmation by the patient, the slot is marked as active. If there is a prepayment policy associated with the practice, the payment window will start only upon the confirmation of the appointment.
For further details, review this video: Calendar management video